Shadowrocket Official Manual
Shadowrocket Setup Guide
Import an existing subscription → choose Global Routing → connect for the first time → verify it works. Establish one working connection before adjusting rules or automatic connection conditions.
Add Server: Add a server or subscription
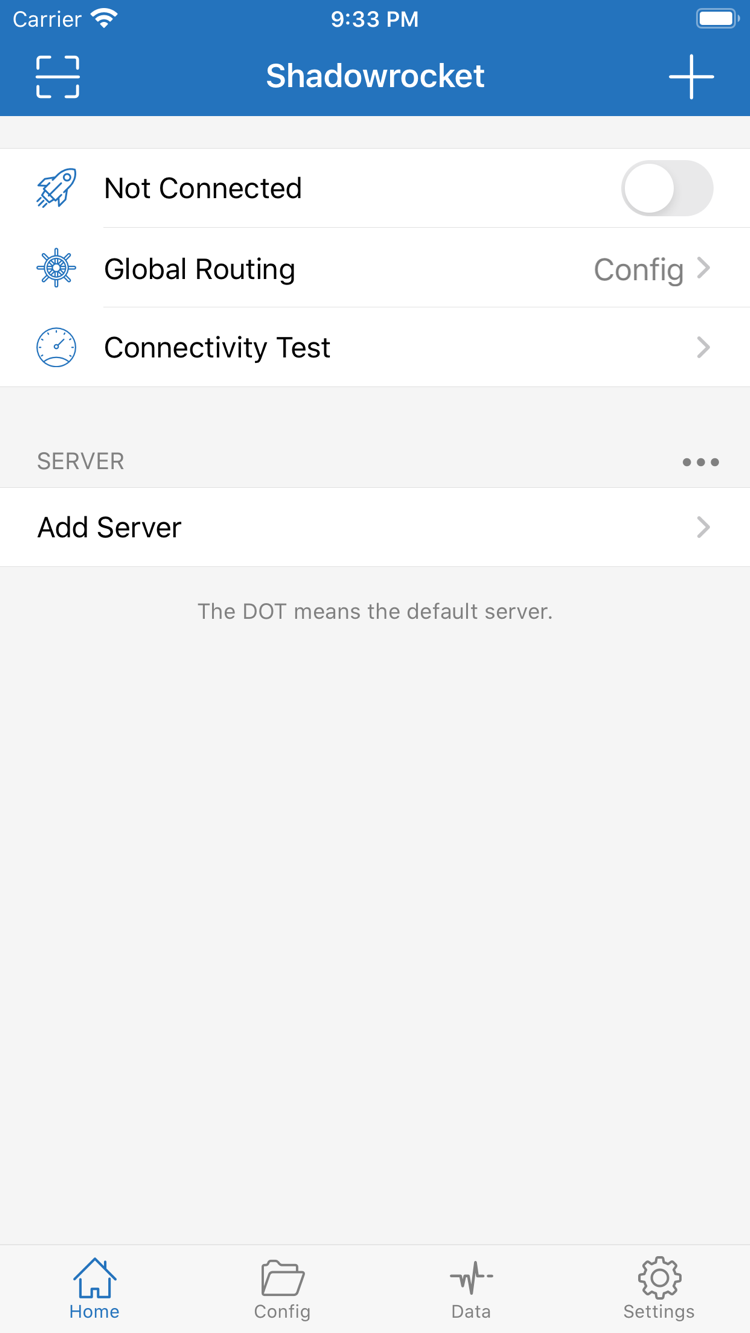
Open Shadowrocket and stay on Home. The SERVER section below lists servers and groups; it may be empty the first time you use the app. Tap Add Server to open the add screen. Choose just one method that matches the information you have: use Subscribe for a complete subscription link, enter the address, port, and password manually for a single server, or use the QR scanner if you already have a QR code. Avoid importing the same information repeatedly in different ways, which can create confusing duplicates.
Have a subscription link? Choose Subscribe
Open Type in Add Server, select Subscribe, and enter the complete subscription link in the link field for that type. Check for extra spaces or line breaks at the beginning or end, and make sure you have not omitted any parameters after a question mark. A subscription link is not the same as an ordinary web address: a page that opens in a browser may not be a valid import link. Use the subscription address provided by the service you already use. Do not assemble one from a webpage title or sharing instructions.
After saving, return to Home and wait for the list to load. If a subscription group appears, expand it and confirm that it contains server names. A subscription name with no servers beneath it does not mean the import is complete. Try updating the subscription, then check the network and the validity of the link. Updating reads remote content and may replace server fields under that subscription. Record any manual changes you need to keep; see the server management guide for ways to organize entries over time.
Have details for one server? Check each field
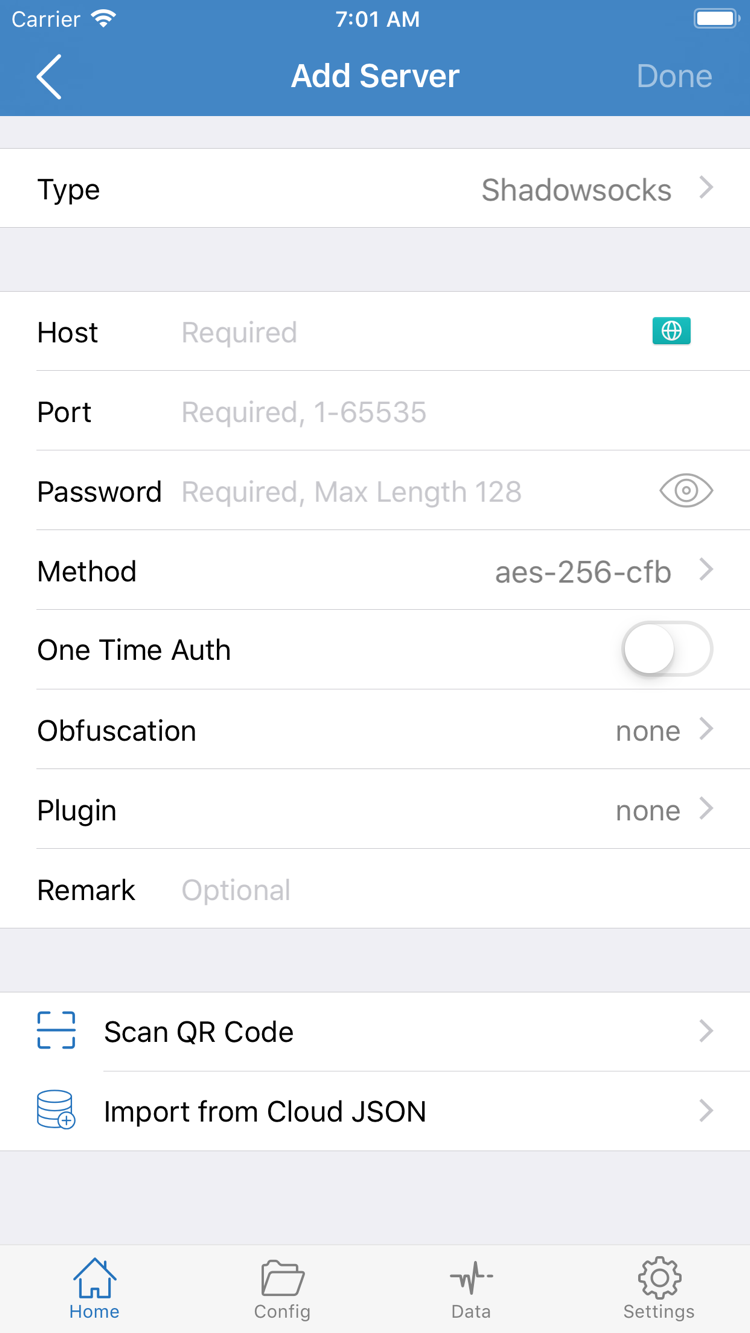
If you have details for a single server, select the matching protocol under Type, then enter Host, Port, and the authentication details required by that protocol. Host is usually a hostname or IP address; do not include a webpage path. Enter the corresponding port in Port. Keep the original capitalization and symbols in Password. Choose a Method only if the selected protocol requires one, and use the value from your original details rather than substituting a similar-looking name. Fields vary by Type, so the fields shown in a screenshot are not a fixed list for every protocol.
If you already have a QR code, tap Scan QR Code, grant camera access when prompted, and scan it. Then check the parsed protocol and fields. Import from Cloud JSON is an import option for a specific format, not a place to paste an arbitrary subscription link. After saving, return to SERVER and select the intended server. Check its name and key fields before moving on to choose how traffic is handled.
Global Routing: Choose among three modes
Once the server appears in the list, return to Home and tap Global Routing. This determines how traffic is handled overall; it does not fill in server details or repair an invalid subscription. One common source of confusion is that selecting a server, choosing a routing mode, and turning on the connection are three separate actions. Seeing a server in the list does not mean current traffic is going through it.
- Config: Match traffic against rules in the currently active configuration. Different destinations may use PROXY, DIRECT, or REJECT. Choose this mode when you need rule-based routing.
- Proxy: Handle traffic through the proxy. This can help you temporarily check whether the selected server can connect. It is not a permanent troubleshooting switch or a substitute for checking rules.
- Direct: Connect to the destination directly over the device's network. This is useful for checking direct connectivity. If a webpage opens in this mode, that does not mean the proxy server is working.
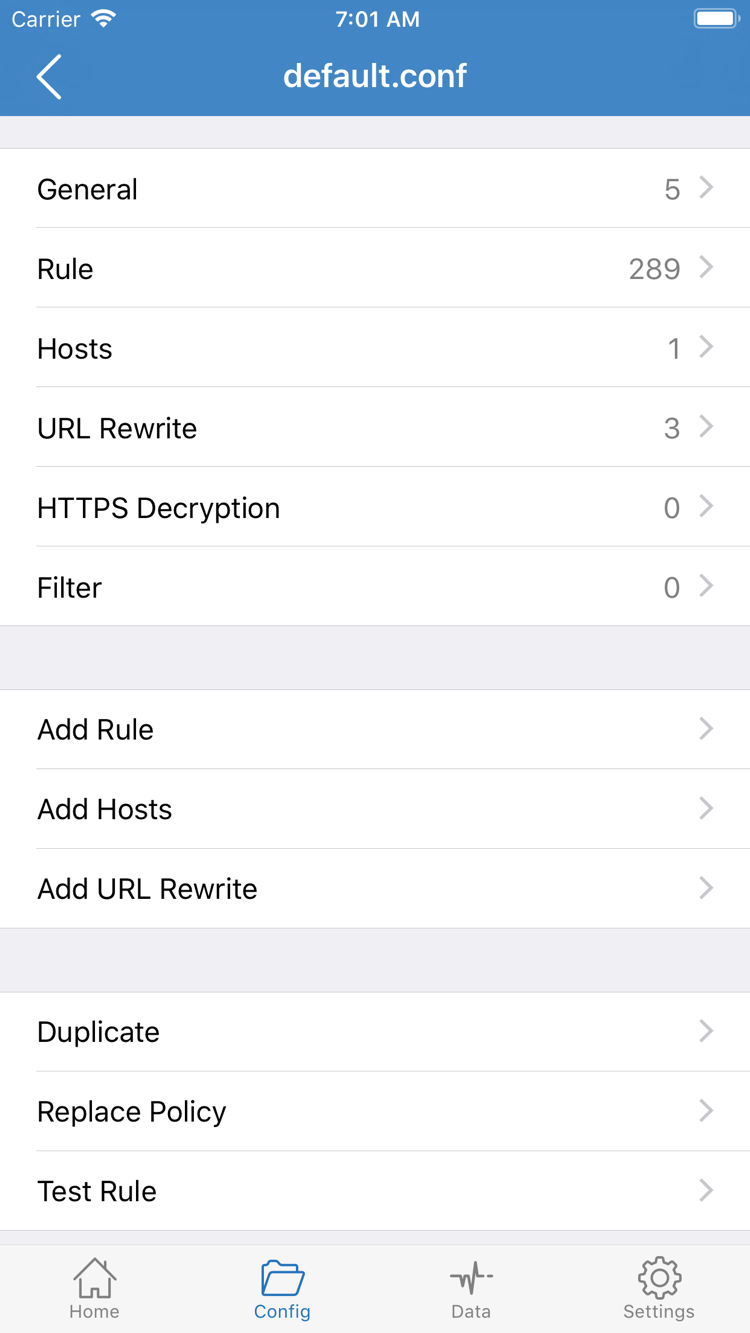
For rule-based use, choose Config, then open the Config page and check which file is active. Config under Global Routing is a routing mode, while the Config tab at the bottom manages configuration files. They have the same name but different functions. General, Rule, and Hosts in the screenshot are different sections within a file. The presence of a file alone does not mean its rules suit your needs.
You do not need to edit rules as soon as you start. To check whether a server can connect, temporarily choose Proxy, complete the basic checks in Step 04, and then restore Config. If Proxy works but a destination does not work under Config, first check where that destination's rules send traffic instead of adding the same server again. Note your original mode and configuration file before making changes so you can restore them.
Add Rule adds a rule, not a server. An entry such as DOMAIN-SUFFIX,example.com,PROXY selects a policy by domain suffix, while DIRECT means a direct connection. Here, you only need to understand that rules affect a destination's route; do not add an example rule just to match the screenshot. For more on rule order and the difference between subscriptions and configurations, see the FAQ. Leave the current settings as they are while completing the connection steps.
Home: Turn on the connection and authorize it
Return to Home, confirm that the intended server is selected under SERVER, and check that Global Routing is still set to the mode you chose. If the list contains several similar names, distinguish them by their notes or details. Do not switch servers and change the configuration at the same time. Once everything is set, turn on the connection switch at the top of the page. When disconnected, the app may show the Not Connected status.
When you start a connection for the first time, the system may ask to add a VPN configuration. Review the app name and permission details in the prompt. Confirm that Shadowrocket initiated the request, tap Allow, and complete password or biometric verification as prompted. You may briefly leave the app during authorization; when it is complete, return to Home and check the status. If you tapped Cancel, turn the connection switch on again to send a new request instead of repeatedly deleting servers from the list.
Once connected, the status at the top changes accordingly. The system may also show a VPN indicator in the status area or Control Center, depending on the device and system layout. This indicates that the system connection configuration is enabled; it does not prove that every server or domain is reachable. Do not enable more automation yet. Move on to the next step and test the connection directly.
If the switch immediately turns off again, note whether this happens before or after authorization. Before authorization, check the system permission flow. After authorization, check the server, configuration, and basic network. If another VPN connection is running on the device, disconnect it before testing so that a replaced connection is not mistaken for an import failure. Devices managed by an organization may restrict VPN configurations; follow the device management requirements if you see a restriction notice.
Connectivity Test: Verify the connection
With the connection switch on, use Connectivity Test on Home to check the server's test result. The test takes time, so wait for it to finish before doing anything else. Treat the result as connectivity feedback from a particular test method, not as a guarantee of bandwidth, stability, or access to every destination. No response from one server does not mean every entry in a subscription is unavailable.
Next, open a browser and visit a destination you actually need to use and know to be correct. Reload the page or use a new browser window to reduce the effect of existing cache. Test one destination, then another. If only one app has an issue, compare its behavior with the browser before concluding that the entire connection has failed.
Under Config, some destinations may use DIRECT by design, so opening a webpage does not confirm that its request used the proxy. Check the current configuration rules to determine the route. If connection records are available in the app, check the matching result against the destination hostname. A request appearing in the records does not mean the remote site has fully returned the page; compare it with the actual result in the browser.
To compare results, note the current mode, temporarily switch to Proxy, visit the same destination, and then restore Config. If the two modes behave differently, continue by checking the rule route. If both fail, check the selected server and network first. Keep the destination, network, and server the same for each comparison so you can identify the cause without changing too many variables.
Settings: Troubleshoot in order
If you could not complete the checks above, keep the current configuration and note what happened. Then troubleshoot in the order below. Do not change the subscription, server, DNS, and rules all at once; if the connection works again, you will not know which change fixed it. Recording which step failed, the network in use, the mode, and the destination is usually more useful than repeatedly reinstalling the app.
The list is empty or the subscription update fails
Turn off the connection first. Confirm that the device's current network works, then check that the subscription link is complete and still valid. A regular sharing description, webpage address, and address used by Subscribe may not be the same kind of content. If the subscription updates but shows no servers, check whether a group is collapsed or a filter is active. If the list is still empty, ask the provider of your existing service to confirm what the link returns. Do not repeatedly add entries to overwrite an error; keep the original entry and any relevant error details.
The server is listed, but the test fails
Open the server details and compare Type, Host, Port, and authentication fields with the original information. Different protocols require different fields; a server name alone cannot confirm that the parameters match. Once checked, compare with another server you already have, then try switching between Wi-Fi and cellular. If you use cellular, keep track of your data usage. If the issue occurs only on the current network, focus on the network environment instead of repeatedly changing the password.
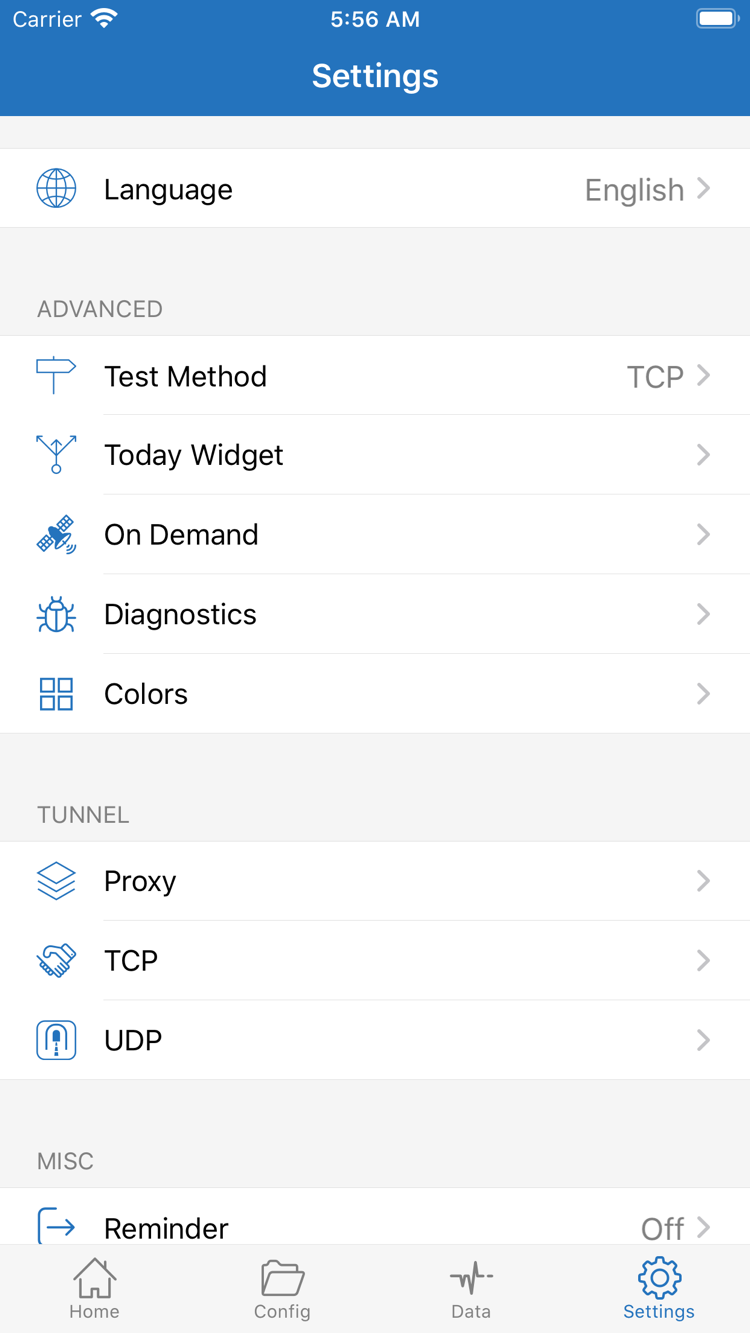
Check Test Method in Settings. Different test methods check different parts of the connection, so different results after changing the method are not necessarily contradictory. Keep verifying access to actual destinations rather than aiming for a number from a particular test. See the connection troubleshooting FAQ for more on the difference between a test timing out and a destination being reachable.
The connection succeeds, but some destinations fail
First confirm that the mode is not Direct, then compare the same destination under Proxy and Config. If the issue occurs only under Config, open Config and check the active file and rule order. Make sure a destination that should use the proxy is not routed to DIRECT or REJECT. If a domain cannot be resolved, check the DNS settings. Do not replace the original file with a configuration you do not understand. The server management guide covers organizing the list and backing up configurations; for now, focus on isolating the issue.
Manual connections work, but automatic connections do not
On Demand starts connections when its configured conditions are met. When getting started, use manual connections until basic access is stable, then configure automatic conditions. If the connection drops and reconnects, or its status changes after switching networks, check whether On Demand is enabled. To troubleshoot, note the original conditions, temporarily disable them, and compare results. This helps distinguish automatic triggers from a faulty connection switch.
Diagnostics can provide more diagnostic information. Before describing an issue to others, remove subscription links, passwords, and other authentication details. Include only the necessary error text, network type, and steps taken. After troubleshooting, restore any temporary mode or test settings. If the connection works, there is no need to keep changing Proxy, TCP, UDP, or other Settings options.